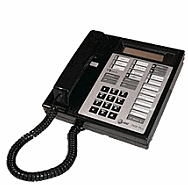
Features of the Multi-Line Phones
Models 6408D+, 7406+, 8410D


- Display Screen Features
- Abbreviated Dialing (AD) Buttons
- Automatic Callback
- Call Forwarding
- Call Park
- Call Pickup
- Conference Calling
- Drop
- Go To Cover
- Hold
- Redial
- Send All Calls
- Transfer
- Voice Mail Instructions
Note: Some of the features listed may not be programmed on your 7406+ telephone. To request any of these features, please call the CCRI Help Desk at x1112.
Display Screen Features
The Display Screen features provide you with updated call and message information. The information displayed on your screen depends upon the display mode that you select.
Normal Mode
In normal mode, the display screen shows information identifying the calling or called
party and calling or called number.
Example: DOE, J234 (name extension)
Inspect Mode
In Inspect mode, the display screen shows information for an incoming call when you are on an active call. To use this feature on an incoming call, press your Inspect button when you receive a new call. The new caller’s information will be displayed. To use this feature on a held call, press the Inspect button and then the call appearance of the caller on hold. You will remain connected to your present caller and see the information of the caller on hold. (The caller will remain on Hold; do not press Hold again.)
Directory – Next – Call Display
In Directory mode, you can search for a desired extension number in the telephone system and then call that number without dialing. To use this feature, press the Directory button and spell the desired party’s last name using the letters on the dial pad. The display will show the closest match until all letters are entered or you may press Next to scroll until the desired party’s name and extension is displayed on the screen. Press the Call Display button to dial the extension.
Date & Time
In Date & Time mode, you can see the current date and time. To use this feature, press the Date & Time button. The display will show the date and time and then return to normal mode after a few seconds.
Timer
In this mode, you can display the elapsed time of a call (hours, minutes, seconds). To use this feature, press the Timer button to start and the Timer button again to stop and clear the display.
Abbreviated Dialing (AD) Buttons
Abbreviated Dialing buttons allow you to store selected numbers for quicker and easier dialing. Each number can be a complete telephone number, an extension number, or a Feature Access Code. These numbers can be changed at anytime by you. Use this feature as a time saver for dialing frequently called, lengthy, or emergency numbers.
Example: 9 - 1 - (Area Code) XXX - XXXX
To Program AD Buttons
- Receive Dial Tone.
- Dial * 0.
- Press the AD button to be programmed.
- Dial the number you wish to store.
- You can store up to 24 digits. Be sure to include "9" for outside calls as well as 1 + Area Code for long distance calls.
- Press #.
- Hang up.
To place a call using AD Buttons
- Press the selected AD button.
- The number is automatically dialed.
Automatic Callback
Use Automatic Callback when you place a call to a 4-digit extension and receive a busy signal, re-direct tone or no answer. The system will send you a 3-burst priority ring when the extension you called hangs up on their present call or, for an unanswered extension, when the called person picks up and then hangs up their phone. This feature eliminates the need to redial a busy or unanswered extension. Once you receive the 3-ring burst, simply pick up your handset and the system will automatically call the extension set for Automatic Callback. If the extension cannot accept a new call because it became busy again, you will hear three rings and then silence. Your call will remain queued. After 30 minutes, this feature will automatically cancel.
To Activate Automatic Callback
- During a call to a busy or unanswered extension, press Auto Callback.
- The green lamp lights and remains lit until the callback is completed or canceled.
- The display will briefly show "ACB" in the upper right hand corner.
- Hang up.
- You will receive a 3-burst priority ring when the extension you attempted to call becomes available.
- Lift the handset when you hear the priority ring.
- The call is automatically placed to the extension which then receives regular ringing.
To Cancel Automatic Callback
- Press Auto Callback again (while handset is on hook).
- The green lamp will go off.
Note: Only one Automatic Callback can be activated at a time for a 7406+ telephone.
Busy Indicator
The Busy Indicator feature allows you to monitor the status (busy or idle) of an extension number or hunt group. You can determine the status of the station or hunt group by checking the light next to the Busy Indicator button for that number. If the green light is on, the extension is in use. If the light is off, the extension is idle. This button can also be used to dial the extension number or hunt group.
To Check the Status of an Extension
- Look at the Busy Indicator button.
- If the lamp is lit, the extension is in use.
- If the lamp is not lit, the extension is idle.
To Place a Call Using a Busy Indicator
- Press the Busy Indicator button.
- The number will be automatically dialed
Call Forwarding
Call Forwarding allows you to send all of your incoming calls to another extension. Use this feature when you are temporarily located at another extension within the CSU System and wish to receive your calls there, or if you want your calls to be answered by someone else.
To Forward All Calls
- Receive dial tone.
- Dial * 2.
- Dial 4-digit extension you wish to send calls to.
- You will hear three beeps.
- Hang up.
To Cancel Call Forwarding
- Receive dial tone.
- Dial # 2 (if it is an older phone, dial #3)
- You will hear three beeps.
- Hang up.
Notes: Call Forwarding must be activated and deactivated from the extension that is being forwarded.
If your calls are forwarded to a busy or unanswered extension, they will follow your coverage path (if one is assigned); not the coverage path of the party forwarded to.
Your extension will receive a short ring as each call is forwarded to alert you that Call Forwarding is activated on your phone. You cannot answer a call at your telephone when it is forwarded.
Call Park
Call Park allows you to put a call on hold and then retrieve it from any other extension on campus. Use this feature when you want to put a call on hold, move to another location to obtain information, and then complete the call at the second location. You can only park one call at a time, even though your extension has multiple call appearances.
To Park a Call
- Press Transfer.
- You will receive dial tone.
- Press Call Park Button or dial * 1.
- You will hear three beeps.
- Press Transfer again.
- Hang up.
To Retrieve a Parked Call
- Dial # 1.
- Dial the extension number that you parked the call from.
- You will hear three beeps and then be connected to the call.
Notes: If you receive an intercept (hi/low) tone, the parked call has been disconnected or retrieved by someone else.
To retrieve a parked call from the original extension, press the Call Park button or dial # 1 and the 4-digit extension.
Call Pickup
Call Pickup allows you to answer another extension in your Call Pickup group from your telephone. A Call Pickup group usually consists of individuals who are located in the same area or who have similar job functions. Use this feature when you wish to answer a call for a group member who is absent or unable to answer their extension. You can only use this feature if both you and the called party are in the same pickup group.
To Answer a Call in Your Pickup Group
With a Call Pickup Button
- Press Call Pickup button.
- You are connected to the caller.
Without a Call Pickup Button
- Receive dial tone.
- Dial * 7.
- You are connected to the caller.
To Answer a Call While on Another Call
- Press Hold.
- Current call is put on hold.
- Follow steps above.
Note: If you receive a busy signal when using Call Pickup, the call has already been answered. Also, be sure you hear dial tone before dialing *7; failure to do so will result in a fast busy signal and you will not receive the call.
Conference Calling
Conference Calling allows you to add parties to a current call so that you can conduct a 6-way conversation (including yourself). Use this feature to set up time saving conferences, or to spontaneously include additional parties to a discussion.
To Add Another Party (up to 6 parties)
- Press Conference.
- You will receive dial tone.
- Present caller(s) put on hold and remains connected.
- Dial number of new party and wait for answer.
- Once the new party answers, you may talk privately before adding them to the conference call.
- If you do not receive an answer or the number is busy, press the button with the fluttering light to return to caller(s) on hold.
- Press Conference.
- All of the parties are connected.
- Repeat steps 1 - 3 for adding additional parties.
To Add a Call that is on Hold to a Conference
- Press Conference.
- You will receive dial tone.
- Press the call appearance of the caller on hold.
- Press Conference.
- All of the parties are connected.
To Drop the Last Party Added to a Conference
- Press Drop.
- Only the last party added can be dropped, other parties must hang up to be released.
Drop
The Drop feature allows you to disconnect from a call and receive dial tone without hanging up the handset or pressing the switch hook. Use this feature when you want to disconnect from a call and place another call right away. This feature can also be used with the Conference feature to disconnect the last party added.
To Disconnect from a call
- Press Drop.
- The call is dropped and you will receive dial tone.
Go To Cover
The Go To Cover feature allows you to send a call directly to a person’s Cover Path. This feature is useful when you know a co-worker is not at their desk and you wish to eliminate extra ringing at their phone and go to their next point in coverage (for example: voice mail).
To Send a Call to Cover
- Dial the extension you wish to call.
- You will hear ringing.
- Press Go To Cover.
- Display will show "cover" in upper right hand corner.
- You will go to the called party’s next point in coverage.
Note: The called party’s telephone will ring, and be able to be answered until Go To Cover is activated by the caller.
Hold
The Hold feature allows you to temporarily disconnect from a caller, use your telephone for other call purposes (such as obtain information, consult another person, or answer a second call) and then return to the held call. While a call is on Hold, you can place another call, activate another feature, answer a waiting call, or leave your telephone to do another task.
To Place a Call on Hold
- Press Hold.
- The green lamp next to the call appearance flutters.
To Place a Call on Hold and Answer or Place Another Call
- Press Hold.
- The green lamp next to the call appearance flutters.
- Press the call appearance button of the next call.
- You are connected to an incoming call or will receive dial tone to place another call
To Return to a held call
- Press the call appearance with a fluttering light.
- You are connected to the held call.
Note: If you are on an active call and press the call appearance of the held call before placing the active call on hold, the active call will be disconnected.
Redial
The Redial feature allows you to automatically redial the last number (up to 24 digits) dialed from your telephone. Use this feature to save time when redialing a busy or unanswered call.
To Automatically Redial the Last Number Called
With a Redial Button
- Press Last number dialed.
- Your telephone will redial the last number you called.
Without a Redial Button
- Receive dial tone.
- Dial *9.
- Your telephone will redial the last number you called.
Send All Calls
Send All Calls is used in conjunction with Call Coverage and stops calls from ringing at your extension by sending all of your calls to the next point in your Call Coverage path.* This feature can be used when you will be away from your desk, or do not wish to be interrupted with telephone calls. This feature decreases the number of rings a caller will hear before being redirected. Use this feature when you go home or do not wish to be disturbed by a ringing telephone.
To Send All Calls to Call Coverage
With a Send All Calls Button
- Press Send All Calls button.
- Green lamp will light.
Without a Send All Calls Button
- Receive dial tone.
- Dial * 3
- You will hear three beeps.
To Cancel Send All Calls
With a Send All Calls Button
- Press Send All Calls [SAC] button.
- Green lamp will go out.
Without a Send All Calls Button
- Receive dial tone.
- Dial # 3
- You will hear three beeps.
Transfer
The Transfer feature allows you to transfer a call to an extension within the college system. (You cannot transfer a call to a number outside of the CSU system.)
To Transfer a Call to Another Extension
- Press Transfer.
- You will receive dial tone.
- The present call is put on hold.
- Dial the 4-digit extension you wish to transfer to.
- You will hear ringing.
- Remain on the line and announce the call if you wish.
- If the extension you called is busy or unanswered, return to the held call by pressing the call appearance with the fluttering lamp.
- Press Transfer.
- The call is sent to the dialed extension.
- Hang up
Voice Mail Instructions
- To set up a new mailbox
- Dial 1022 from any campus.
- When the generic voice answers, press the # sign
- Enter the four digit mailbox number
- Enter the default security code, 7422
- Enter a new security code, then press the # sign (security code must be at least four digits)
- The system will then ask you to reenter the new code a second time and then press the # sign.
To record a greeting
- Press 4 then 6 and speak your greeting. Press the # sign when you have finished speaking.
- To listen to your greeting press 4 then 5. Press the # sign
To check messages on or off campus
- Dial 825-1022 from outside the campus or 1022 from any campus.
- When the generic voice answers, press the # sign.
- Enter your 4 digit mailbox number.
- Enter your security code.
- The system will then announce if you have messages.
- When you are finished, log off by pressing 99.
- Voice mail codes
5 - listen to messages
7 - save messages
3 - erase message
2 - go backward in message
4 - go forward in message
8 - time-date of message
13 - forward a copy of message