How to Schedule Conference Rooms in Outlook
Automated Resource Booking allows users to schedule conference rooms when setting up meetings in their Outlook calendar. Users can see free/busy times for conference rooms, and conference room requests can be automatically approved.
A conference room has its own calendar, which can be viewed in a meeting request much like an individual’s calendar. When a request for a conference room is accepted, an event is added to the conference room’s calendar.
Any equipment needed in the conference room can be requested by filling out the Equipment/Training Request Form available on the CCRI website after you have scheduled your room. Requests for additional equipment must be made at least one business day in advance.
Scheduling a Conference Room
To schedule a conference room for your meeting, follow the instructions below. Please note: only the person who owns or originated the meeting will be able to schedule the conference room for that meeting. Outlook treats the conference room as a guest, meaning you invite the room to the meeting. Once a conference room is added, it appears in both the “To:” and “Location:” invitation fields.
In Outlook Desktop Client
- Click on the Outlook Desktop Icon.

- When your Outlook email account opens, click on Calendar.

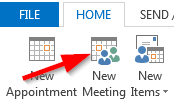
- In the Home tab, click on New Meeting.
- The untitled – Meeting window will open.
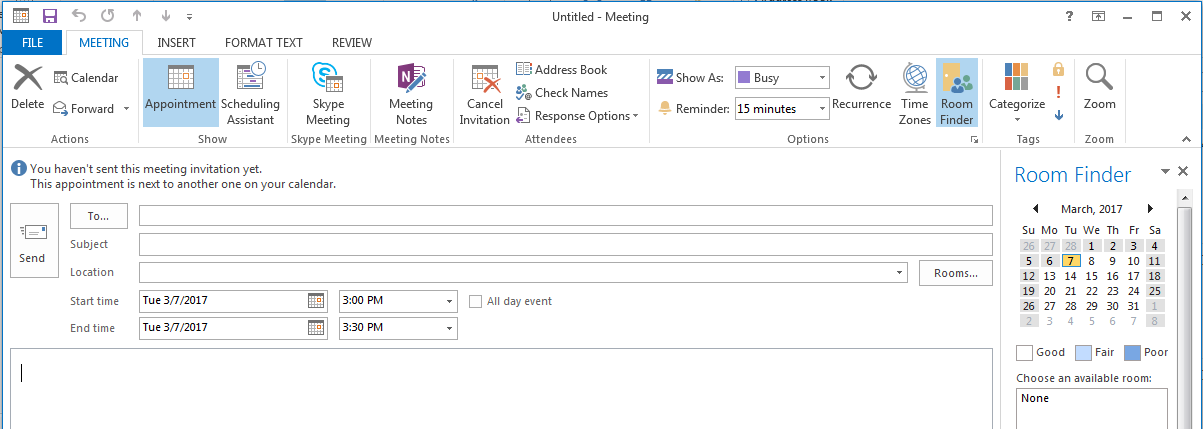
- After filling out the meeting information such as, To, Subject and Date, Click on Rooms.

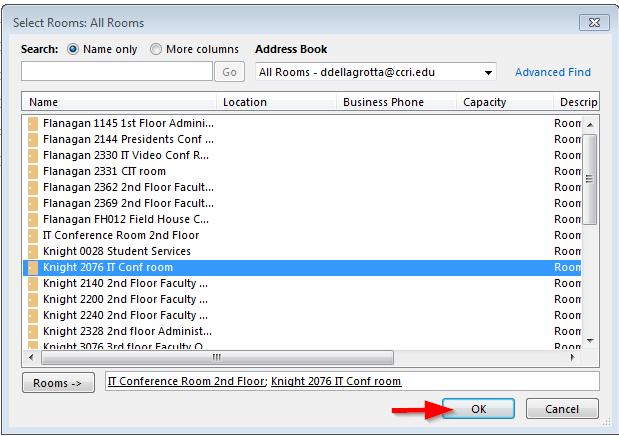
- A list of conference rooms will appear. Select the room by double clicking on it.
It should appear in the bar next to rooms. Click OK. In this example, two rooms were selected.
- The room will appear in both the To and Locations area.

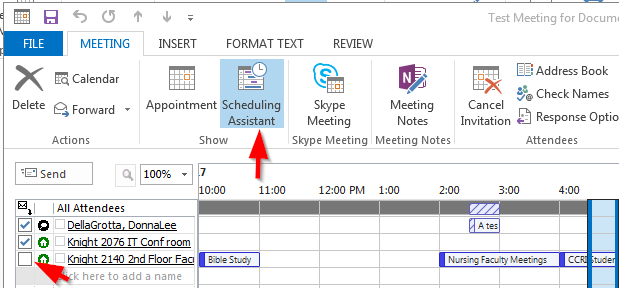
- Click on Scheduling Assistant to view the room’s availability. In this example one room is already booked and one
room is free.
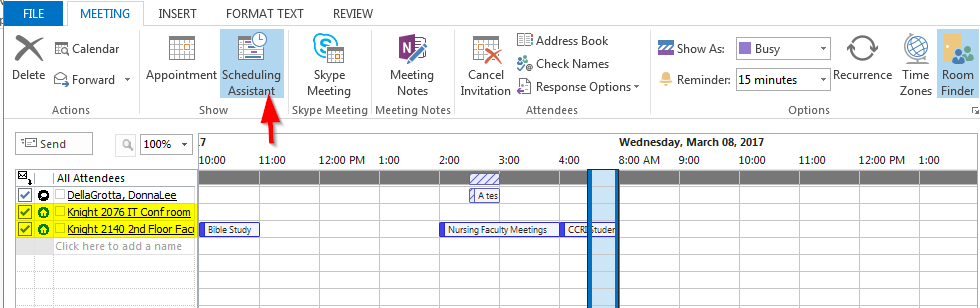
- If more than one room is selected, uncheck the room that is unavailable and/or unwanted,
and then click on Appointment.
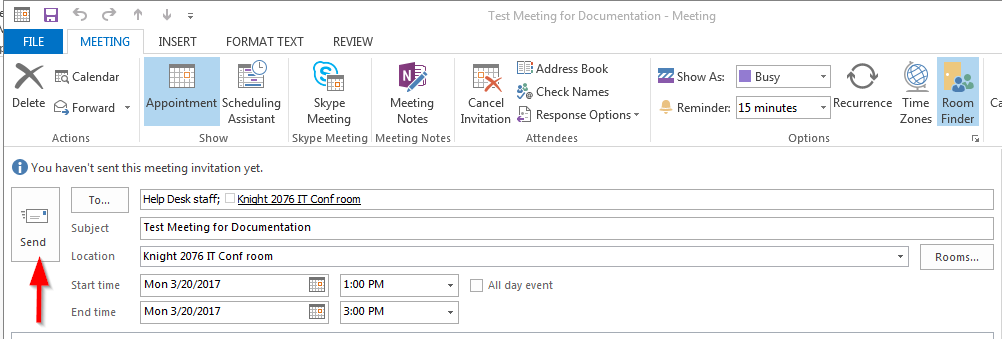
- The room selected will appear in the To area along with the invited guests. Click Send to finalize your meeting and your location.
In Webmail (Outlook Web Access)
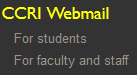
- Go to www.ccri.edu, in the footer at the bottom, under CCRI webmail, click on For faculty and staff. Log in using your CCRI username and password.
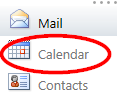
- When Webmail opens up, click on Calendar.
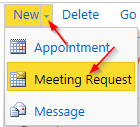
- Open the drop down menu next to New and click on Meeting Request.
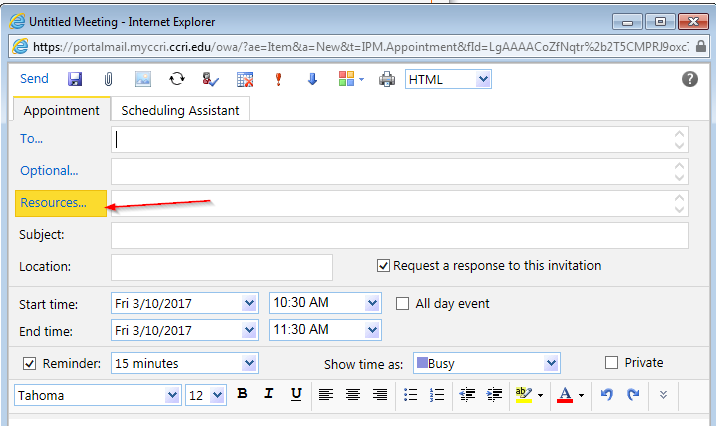
- The untitled – Meeting window will open, click on Resources.
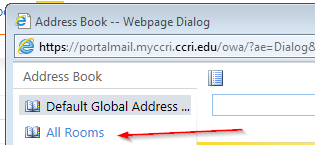
- The Address Book - - Webpage Dialog window will open, click on All Rooms.
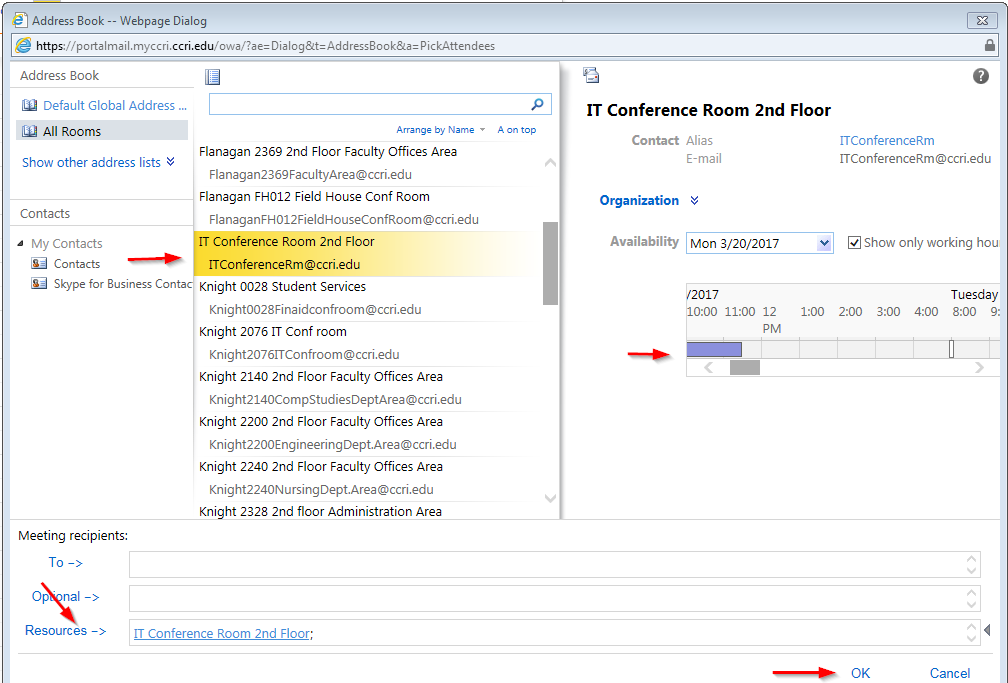
- From the rooms and availability calendar, select the room and the date. The blue shaded
area indicates the room is booked. If available, double click on the room. It will
appear in the Resources area, then click OK.
- In the Untitled Meeting window the room will appear in the Location and Resource area. Complete the request by filling out the (To, Subject, Start time/End time, both the date and the time). Then click Send.

Viewing a Conference Room’s Calendar
You can view the calendar for a conference room to see if it is available.
In Outlook Desktop Client
Viewing a conference room
- In Outlook, go to your calendar and click on “Open Calendar”.
- Select “From Room List” from the menu

- You will see a list of conference rooms available to you. Select the conference room whose calendar you wish to view.
- It will now be available as a calendar you can view.
In Webmail(Outlook Web Access)
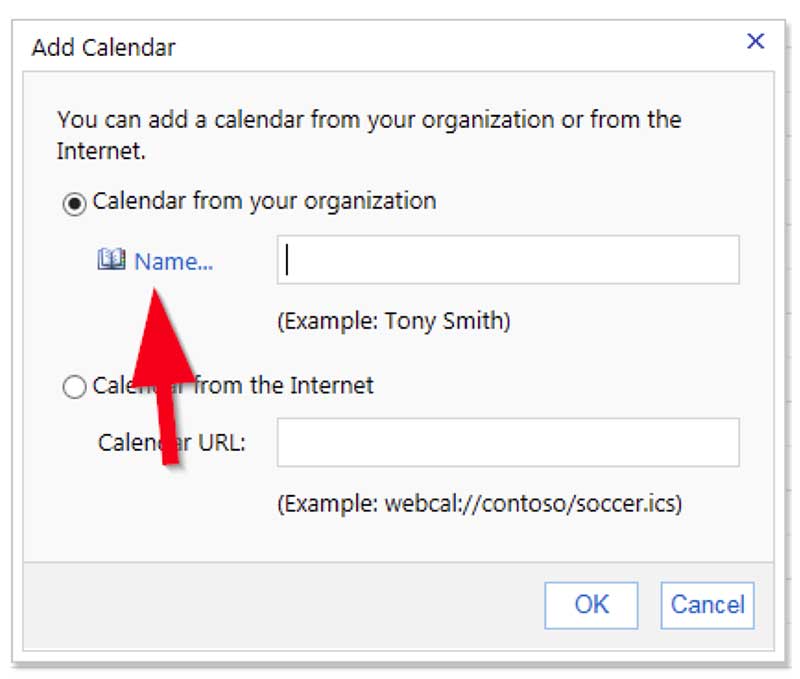
- In Webmail, go to your calendar and click on “Share” and then “Add Calendar”

- A window prompting you to “Add Calendar” will appear. Select “Calendar from your organization”
and click on the “Name” button
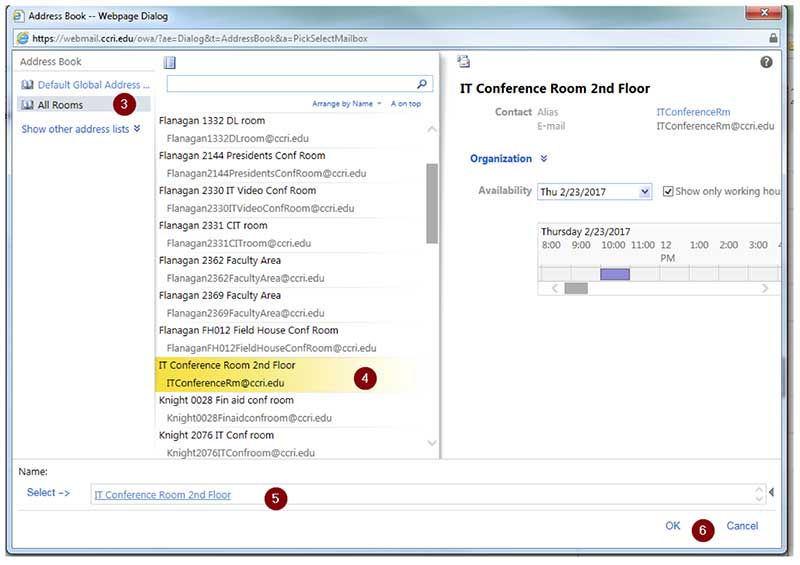
- Click on “All Rooms”.
- You will see a list of conference rooms available to you. Double click on the conference room whose calendar you wish to view.
- The conference room will appear in the “Select” field.
- Click “OK”
- You will return to the “Add Calendar” window. The “Name” field will have the conference room listed. Click “OK”. You should now be able to view the calendar for that conference room.
If you have questions or need help in scheduling a conference room, please contact the CCRI IT Help Desk at 825-1112, or [email protected].